[Index]
[Part 1]


[Nice Paint...] [Jeepers Peepers...]


Painting:   I base coated the entire tank with Tamiya XF-1 Flat Black.   This helps me look for any imperfections and is also a part of my shading process.   Having found a print of a BT-7 in a 3 color camouflage of green, tan and dark brown, I decided to try it.   The result did not turn out the way I planned, so I decided to repaint it the standard "Soviet Green."   I resprayed the black and then hit it with Vallejo Model Air Russian Green #017.   I then toned it down, adding some Tamiya XF-59 Buff, hitting the middle of panels and where the paint would have faded.   I would normally add markings, but most of these tanks were devoid of any.


[Finishing the lower hull...]


The lower hull and wheels received an over spray of Buff to start to give it a dusty appearance.   I pin washed the various weld seams, rivets and other details and when that was dry, lightly dry brushed to accentuate the details.   The Friul tracks were dipped in Blacken-It.   This was the first time I had used it and I really like the color it gives the metal.   They were then given washes of various rusts and browns.   Finally, I lightly sanded them, just hitting the treads and contact points.


[Mig pigments for that dusty country lane look ...]


Mig pigments were used to dirty the tank/tracks, and I added scratches, chips, and other wear marks with an ebony pencil, trying to not go to overboard.   The exhausts were painted a rusty color and various orange, brown and black pastels were brushed on before being attached.   I also added Hudson & Allen heavy tow chains to the front and rear, and a rag on the engine deck.


[Dude 1 - Alpine Miniatures #35005]
Figures:   The figures I chose all have the pre/early war type of uniforms and were used unmodified except for the figure in the turret from Alpine Miniatures #35005.   I had to cut off his legs below the knee for him to fit.


[Dude 2 - Platoon #PT-009 with a Verlinden map] [Dude 3 - Mig Productions #MP35-131]


The pointing figure is from Mig Productions (#MP35-131), and the tank commander is from Platoon (#PT-009) with a Verlinden map.   On all three the skin tones were done in oil over an acrylic base, and the clothing was shaded/highlighted with oils/enamels over an acrylic base.   The standing tank commander's leather coat was deliberately left with a glossy sheen to simulate the leather.


[Note the three tiers, with the grassy knoll, the road, and the ditch at the bottom.]


THE BASE:   I wanted to give this small diorama an interesting and appealing setting, so I settled on three tiers, with the grass knoll/tree on top the dusty country road in the middle, and the ditch/trail at the bottom.   The base itself was cut out of thick insulating foam and contoured with my foam cutter and files.   Cutting a perfect circle in foam is not an easy task.   Once I had the shape, Celluclay was used for the main ground work.   While still wet I added fine sand, kitty litter and small pebbles, and made the impressions on the road.   Once dry, I airbrushed the ground work various shades of brown.
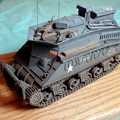


[Note the tall grass, and shurbery.]


Next I added the tall grass.   This was done by using the bristles of a cheap paint brush, colored various shades of greens and yellows.   The bushes lining the road are seafoam with various dried herbs/crushed Hudson & Allen ground litter for foliage.   The barbed wire fence was scratch built, taking fine wire and wrapping it just like the real thing, and nailing them to the posts made out of match sticks.   The road signs also were scratch built.


[The tree is a modified Armand Bayardi dead tree.]


The tree started out as an Armand P. Bayardi dead tree, which I grafted roots on to for the main branches.   The small branches are again seafoam with dried herbs/crushed Hudson & Allen ground litter for the leaves.   After initially spraying them brown, I went back over spraying various greens.   Each one was the inserted into holes drilled in the branches.   This was rather tedious, but I feel it gives the tree a much more realistic appearance.   Once the base was completed I bolted the tank down and added more pigments to marry the tank with the base.   The figures were then added, and finally the nameplate.


Overall I am very pleased with how this little diorama turned out.   I used a number of new techniques, some I will use again, and some I will not, so it was a great learning experience.   I hope you enjoy viewing it as much as I enjoyed building it!


REFERENCES:   Armada #17 "Tank BT" Part 3
Model Point "Red Stars in Detail" Photo Reference CD Vol. 1


[Overview]


[Index]
[Part 1]