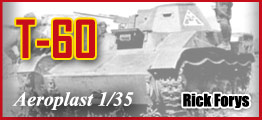
| The Russian T-60 light tank has never received a lot of love from the modeling
industry. I believe there are only three options in 1/35 scale, and one of these is the
tired and toy-like Zvesda kit. The other two kits are much better, but are essentially
the same kit. Polish manufacturer Aeroplast released the "standard" version of the kit
some time ago, and within the last 10 years, it was re-issued by RPM accompanied by a big honking
sheet of photo-etch parts. Both kits provide spoke and solid wheels, so an early or late
version can be produced. The late pattern exhaust is not included in either kit.
|
|
![[The hull is assembled from flat plates, but this Polish made kit goes together well with no real issues.]](RF-T60-001b.jpg) |
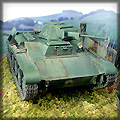
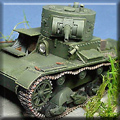
| The Polish made kit goes together well with no real issues. The hull is
assembled from flat plates, as is typical with Eastern European kits, but everything fits and lines up
just fine. The suspension is simple and sturdy, but detail is maybe a little soft. I added
some nut & bolt detail to the suspension arms with some Grandt bolts to busy it up a bit. The spoke
wheels look good, and a wash and dry brushing really make them pop.
|
|
| The Aeroplast kit I got came with an extra set of better-detailed separate link tracks,
miles ahead of the kit tracks. They appear to be similar to Kastin tracks. I thought about
using a set of Fruil metal tracks, but as I was trying to keep this build simple, I went with the supplied
plastic upgrade tracks. Also to change things up a bit, I replaced one of the spoke wheels with a
solid wheel, as often happened when a wheel was damaged in use.
|
|
|
|
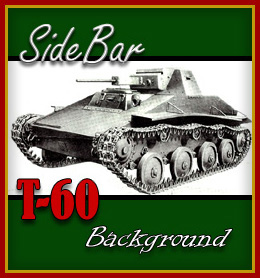
The T-60 was introduced in 1941 as a replacement for the T-40, featuring increased armor and firepower,
but that's not the way it was planned. As it turns out, the T-60 was a last minute left-turn, and
originally not in the long-range strategic plan of the Soviet army. At this time, it was becoming
apparent that the amphibious capabilities of the T-40 weren't as important as more armor and a bigger gun,
so it was planned that Moscow Factory #37 would start production of the T-50, which was designed by Leningrad
Factory #174. However, engineers at plant #37 determined that they did not possess sufficient technology
to produce many of the complicated T-50 components, and lead by N. A. Astrov, literally came up with their own
design that met the goals and would be much easier to produce. They went so far as writing to Stalin to
plead their case, and within a short time the T-60 was accepted, and an order for 10,000 was placed.
|
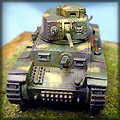
![[Winter wartime T-60.]](T-60-arc2c.jpg) |
|
One of the main reasons it was easier to produce was that the design shared many components with the T-40,
including the chassis, transmission, and the engine. It was also originally designed to use the same
12.7mm machine gun from the T-40, but it was obvious a bigger gun was needed. It appears that a 37mm
gun was tested, however the turret ring could not support the recoil, and therefore the rapid firing, high
velocity 20 mm ShVAK automatic gun also used in aircraft was selected. The hull of the new tank had a
lower profile, and also featured thicker, more sloped armor. A new eight-sided conical turret was also
designed that was much cheaper to produce than the rounded turret of the T-40, and again offered better
protection using thicker armor. Amazingly, basically the entire tank was designed in only 15 days.
|
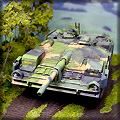
![[T-60 on the Russian prairie.]](T-60-arc1c.jpg) |
|
The T-60 was issued to reconnaissance and infantry units for direct infantry support. The turret was
offset to the left, with the engine mounted on the right, and the driver was located centrally in the front.
The commander /gunner manned the turret and was undoubtedly very busy. Later models can be
distinguished from the early models by the use of solid as opposed to spoke wheels, and a different exhaust.
Over 6000 T-60s were produced before being replaced by the T-70 light tank.
|
|
![[The biggest shortcoming of the kit that must be addressed is the radiator screen, or lack there of, so I dressed up the kit part with brass screen and plastic stock. ]](RF-T60-048a.jpg)
![[I used the RPM photo etched parts as patterns to make most of the brass parts that I used on this build.]](RF-T60-042Xa1.jpg)
![[The driver's front hatch was detailed with a piece of brass filed and bent to shape, and six rivets in two different sizes.]](RF-T60-050b.jpg)
![[The other toolbox is a resin part that came from an MR Models update set, and the padlock came from the RPM set..]](RF-T60-059b.jpg)
![[The tow hook locking mechanisms were scratched from styrene - five little parts per side.]](RF-T60-056b.jpg)
![[The only part that I did use from the RPM photo etch was the open toolbox on the right side.]](RF-T60-115b.jpg)
![[The 20mm gun barrel is a turned metal part from Elefant.]](RF-T60-046b.jpg)
![[All together, I added twenty-four rivets to the turret.]](RF-T60-058b.jpg)
![[I added some fine paint chipping with a sharp tipped brush.]](RF-T60-111b.jpg)
![[I roughed up all the angled corners to simulate the welded plates.]](RF-T60-148b.jpg)
![[Everything was primed with Model Master burnt umber enamel, followed with a 90% coat of MM dark green enamel.]](RF-T60-076b.jpg)
![[I applied several washes of burnt umber, and black, and just a touch of rust here and there.]](RF-T60-078b.jpg)
![[I ran a wire to the front lamp, and inserted an MV lens after paint and finishing.]](RF-T60-097b.jpg)
![[Everything was sealed with MM Acryl flat, and then dry-brushed out.]](RF-T60-109b.jpg)
![[A pigment wash was then applied to the lower hull and running gear, and after drying, the excess was removed, leaving some in the cracks and corners. ]](RF-T60-122a.jpg)
![[This is the Aeroplast T60 in 1/35th scale.]](RF-T60-128Xb.jpg)
![[The Aeroplast kit I got came with an extra set of better-detailed separate link tracks, miles ahead of the kit tracks.]](RF-T60-013b.jpg)